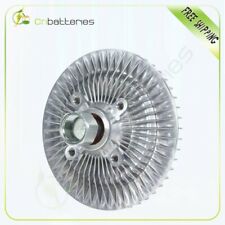
Fitment: For 1996-2010 Chevrolet GMC 4.3L 4.8L 5.0L 5.3L 5.7L 6.0L Cooling Fan Clutch
Fitment:
2007 Chevrolet Avalanche1996-1998 2011-2013 Chevrolet Express 15001996-2009 2011-2013 2015 Chevrolet Express 25001996-2005 2008-2009 2011 2013 Chevrolet Express 35002011-2013 Chevrolet Express 45001996 Chevrolet G301999-2007 Chevrolet Silverado 15002001-2003 2005-2006 Chevrolet Silverado 1500 HD1999-2003 2006 Chevrolet Silverado 25002001-2003 Chevrolet Silverado 2500 HD2001-2006 Chevrolet Silverado 35002000-2007 Chevrolet Suburban 15002011 Chevrolet Suburban 25002007 Chevrolet Tahoe1996 GMC G35001996-2002 2011-2013 GMC Savana 15001996-2005 2007-2009 2011 2013 2015 GMC Savana 25001996-1998 2008-2009 2011-2013 2015 GMC Savana 35002011-2013 GMC Savana 45002007 GMC Sierra 15002005 GMC Sierra 2500 HD2001-2006 GMC Sierra 35002000 2007 GMC Yukon2011 GMC Yukon XL 2500
What is a fan clutch?
A fan clutch is a thermostatic engine cooling fan that can freewheel at low temperatures when cooling is not needed, allowing the engine to warm up faster, relieving unnecessary load on the engine. As temperatures increase, the clutch engages so that the fan is driven by engine power and moves air to cool the engine.
Most fan clutches are viscous or "fluid" couplings, combined with a bi-metallic sensory system similar to that in a thermostat. Some clutches are electronically controlled (instead of bi-metallic strip). These provide the potential to control the level of engagement depending on any number of inputs. Common controlling factors might include engine oil temperature, transmission oil temperature, coolant temperature, AC system pressures and ambient air temperature.
How to detect a faulty fan clutch?
-Fan spins excessively when engine is stopped.
-Poor A/C performance at idle or low vehicle speeds.
-Fan speed does not increase when engine is hot.
-Fan speed does not increase until engine is excessively hot.
-Fan blade tip moves more than 1/4” front to back.
-Fan turns roughly or does not turn at all.
-Excessive fan noise at all speeds due to failed bearing.
-Vibration that increases with engine speed.
How to replace a fan clutch?
Materials Needed
-Pulley locking tool
-Wrench
-Socket set with ratchet
-Rubber mallet
Step 1: Remove the fan shroud. Because every application is different, some of these steps may need to be altered in order to fit your specific application. On most applications, however the fan shroud is fastened by several bolts which will need to be removed in order to remove the shroud. Most applications will also require removal of the top radiator hose in order to get the fan shroud out. If this is the case, be sure to drain your coolant system prior to doing this. Once this is done, you can remove the fan shroud from the engine compartment.
Step 2: Remove the fan. There are typically two types of ways the fan will be attached; one will be with four large bolts, in which case you will need just a basic wrench of the appropriate size to remove. The other method of attachment is a large nut that will likely require the use of a special pulley locking tool that is used to keep the pulley from moving while removing the nut.
Since this is a specialty tool, most people may not have access to this tool. If this is the case, an alternative to using this specialty tool can be the use of a screwdriver. Use the screwdriver to hold keep the bolt in place while loosening the nut. Pay special attention to the placement of the screwdriver while doing this as this can damage the edges of the bolts if not done properly.
Step 3: Rock from side to side. Once all bolts and/or nuts have been removed, hold the fan with both hands slightly rocking it from side to side sliding it off of the water pump shaft.
Step 4: Remove the bolts. Secure the fan on a work table with plenty of room to work with the fan shaft facing your direction. There are four large bolts in the center of the fan assembly that hold the clutch in place. Remove these bolts and the clutch will be free from the fan.
Step 5: Install the new fan clutch. Hold the new fan clutch in place aligning the bolt holes in the same place as the old clutch.
Lightly run the bolts into the holes making sure the threads are lining up properly
Tip: The bolts should run into the threads freely with little or no resistance. If they feel tight or like you are using too much force, you are likely cross threading them which can lead to the bolts not staying in tightly and eventually falling out. Note, this is extremely important.
Step 6: Tighten the bolts. Once you’ve run all bolts in finger tight, use your wrench to tighten them according to factory specifications (refer to your service manual or instructions with the new fan clutch).
Step 7: Put the fan back into the engine. Slide the fan assembly back into the engine compartment paying special attention to the water pump shaft alignment.
Once in place, gently run the four bolts back into place holding the fan with one hand and running the bolts back in with the other. This may take some maneuvering to keep things straight, but remember, slow and steady and paying attention to detail is important.
When all four bolts are back in place and run in finger tight, use the same wrench you used to remove them with to tighten them back up according to factory specifications (Again, refer to your service manual for exact specifications).
If your application requires you to remove the top radiator hose to get the fan shroud out, now would be the time to reinstall that same radiator hose. Be sure to also remember to refill your coolant system if draining it was part of the removal process.
Slide the fan shroud back into place lining up the bolt holes in the same position as it was removed. Run each bolt back in finger tight until all are accounted for and tighten per factory specifications (Refer to service manual for torque specs).
You have now replaced your fan clutch. A good practice as always is to start the vehicle and listen for abnormal noises and watch for movements in the replacement parts that are not consistent.
For 1996-2010 Chevrolet GMC 4.3L 4.8L 5.0L 5.3L 5.7L 6.0L Cooling Fan Clutch
Fitment:
2007 Chevrolet Avalanche1996-1998 2011-2013 Chevrolet Express 15001996-2009 2011-2013 2015 Chevrolet Express 25001996-2005 2008-2009 2011 2013 Chevrolet Express 35002011-2013 Chevrolet Express 45001996 Chevrolet G301999-2007 Chevrolet Silverado 15002001-2003 2005-2006 Chevrolet Silverado 1500 HD1999-2003 2006 Chevrolet Silverado 25002001-2003 Chevrolet Silverado 2500 HD2001-2006 Chevrolet Silverado 35002000-2007 Chevrolet Suburban 15002011 Chevrolet Suburban 25002007 Chevrolet Tahoe1996 GMC G35001996-2002 2011-2013 GMC Savana 15001996-2005 2007-2009 2011 2013 2015 GMC Savana 25001996-1998 2008-2009 2011-2013 2015 GMC Savana 35002011-2013 GMC Savana 45002007 GMC Sierra 15002005 GMC Sierra 2500 HD2001-2006 GMC Sierra 35002000 2007 GMC Yukon2011 GMC Yukon XL 2500
What is a fan clutch?
A fan clutch is a thermostatic engine cooling fan that can freewheel at low temperatures when cooling is not needed, allowing the engine to warm up faster, relieving unnecessary load on the engine. As temperatures increase, the clutch engages so that the fan is driven by engine power and moves air to cool the engine.
Most fan clutches are viscous or "fluid" couplings, combined with a bi-metallic sensory system similar to that in a thermostat. Some clutches are electronically controlled (instead of bi-metallic strip). These provide the potential to control the level of engagement depending on any number of inputs. Common controlling factors might include engine oil temperature, transmission oil temperature, coolant temperature, AC system pressures and ambient air temperature.
How to detect a faulty fan clutch?
-Fan spins excessively when engine is stopped.
-Poor A/C performance at idle or low vehicle speeds.
-Fan speed does not increase when engine is hot.
-Fan speed does not increase until engine is excessively hot.
-Fan blade tip moves more than 1/4” front to back.
-Fan turns roughly or does not turn at all.
-Excessive fan noise at all speeds due to failed bearing.
-Vibration that increases with engine speed.
How to replace a fan clutch?
Materials Needed
-Pulley locking tool
-Wrench
-Socket set with ratchet
-Rubber mallet
Step 1: Remove the fan shroud. Because every application is different, some of these steps may need to be altered in order to fit your specific application. On most applications, however the fan shroud is fastened by several bolts which will need to be removed in order to remove the shroud. Most applications will also require removal of the top radiator hose in order to get the fan shroud out. If this is the case, be sure to drain your coolant system prior to doing this. Once this is done, you can remove the fan shroud from the engine compartment.
Step 2: Remove the fan. There are typically two types of ways the fan will be attached; one will be with four large bolts, in which case you will need just a basic wrench of the appropriate size to remove. The other method of attachment is a large nut that will likely require the use of a special pulley locking tool that is used to keep the pulley from moving while removing the nut.
Since this is a specialty tool, most people may not have access to this tool. If this is the case, an alternative to using this specialty tool can be the use of a screwdriver. Use the screwdriver to hold keep the bolt in place while loosening the nut. Pay special attention to the placement of the screwdriver while doing this as this can damage the edges of the bolts if not done properly.
Step 3: Rock from side to side. Once all bolts and/or nuts have been removed, hold the fan with both hands slightly rocking it from side to side sliding it off of the water pump shaft.
Step 4: Remove the bolts. Secure the fan on a work table with plenty of room to work with the fan shaft facing your direction. There are four large bolts in the center of the fan assembly that hold the clutch in place. Remove these bolts and the clutch will be free from the fan.
Step 5: Install the new fan clutch. Hold the new fan clutch in place aligning the bolt holes in the same place as the old clutch.
Lightly run the bolts into the holes making sure the threads are lining up properly
Tip: The bolts should run into the threads freely with little or no resistance. If they feel tight or like you are using too much force, you are likely cross threading them which can lead to the bolts not staying in tightly and eventually falling out. Note, this is extremely important.
Step 6: Tighten the bolts. Once you’ve run all bolts in finger tight, use your wrench to tighten them according to factory specifications (refer to your service manual or instructions with the new fan clutch).
Step 7: Put the fan back into the engine. Slide the fan assembly back into the engine compartment paying special attention to the water pump shaft alignment.
Once in place, gently run the four bolts back into place holding the fan with one hand and running the bolts back in with the other. This may take some maneuvering to keep things straight, but remember, slow and steady and paying attention to detail is important.
When all four bolts are back in place and run in finger tight, use the same wrench you used to remove them with to tighten them back up according to factory specifications (Again, refer to your service manual for exact specifications).
If your application requires you to remove the top radiator hose to get the fan shroud out, now would be the time to reinstall that same radiator hose. Be sure to also remember to refill your coolant system if draining it was part of the removal process.
Slide the fan shroud back into place lining up the bolt holes in the same position as it was removed. Run each bolt back in finger tight until all are accounted for and tighten per factory specifications (Refer to service manual for torque specs).
You have now replaced your fan clutch. A good practice as always is to start the vehicle and listen for abnormal noises and watch for movements in the replacement parts that are not consistent.
Item SpecificsManufacturer Part Number CB103758S01Product Type Cooling FanBrand AftermarketUPC Does not applyWarranty 1 YearPlacement FrontFitment Type Direct ReplacementMounting Hardware Included NOCustom Bundle NOShroud Material Aluminum;PlasticInterchange Part Number 2744-CNReference Part Number FC14036945, 2911271
Shipping
WARNING: Cancer and Reproductive Harm - www.P65Warnings.ca.gov.
1. Package handling takes about 2 business days at our warehouse, so please make sure entering correct payment and shipping information before checking out. Once your payment is completed, we are not going to accept any more changes to your order.
2.All domestic orders will be shipped via USPS, UPS or Fedex from our US warehouse and usually arrives to your door in about 2-7 business days.
3.Local pick up is not available.
4.Orders to the rest of world may be shipped out from our warehouse in HongKong.
5.International Buyers C Please Note:
a. Import duties, taxes and charges are not included in the item price or shipping charges. These charges are the buyers responsibility.
b. Please check with your country customs office to determine what these additional costs will be prior to offerding/buying.]
Payment
[We only accept payment through PayPal. You can open a Paypal account at]
Returns
1.All of our brand new items come with a 60-Days money-back guarantee.
2.We define the item as defective only if it doesn't function as described, It is the buyer's responsibility to understand the item description before offerding.
3.We will replace the defective items, provided that they are in stock within the warranty period posted with the listing and the buyer return the original item and pay for the S&H cost for the replacement.
4.We will refund the purchase price if the replacement is not available or buyer prefers a refund and send the original item back at his/her own cost.
5.Shipping& handling cost are not refundable.
6.Man-made damage by abuse or wrong operation is not covered by this warranty.
7.No product liability insurance is assumed.
8.Refunds will be credited within 5 to 7 business days of receiving the return. When we've received and processed the return, we will refund the applicable amount minus any Recovery Fees (See Details Below) for the amount you paid for the item(s), plus any applicable sales tax. ]
Customer Services
Q: How do I pay for my purchase?
A: MY store accepts PayPal.
Q: When will the item be shipped out?
A: This item will be shipped with 2 business day once payment completed.
Q: Where is my tracking number?
A: Please log on your account, click "my "-->"my summary", or open your email box and find the shipping notification email.
Q: How do I return an item?
A: My tore accepts returns. Items must be returned within 60 days. Refunds will be given as money back. Please contact our customer service before you return an item. ]
response
1. We will leave a response once we get your payment.
2. If you are dissatisfied for any reason, please do contact us aresponse. We will work hard to make sure EVERY CUSTOMER 100% SATISFIED and resolve any problem for you and always leave a response to all our customers.
3. If you are satisfied with the product you received, wish you can leave us a response.
New List Item Pair: 2 Brand New Front Control Arms w/ Ball Joints for Honda Accord TSX USD 32.50 For Mercury MerCruiser Mechanical Fuel Pump Assembly 1982-1991 18-7288 M60601 USD 62.97 Outside Front Outer LH Left Side Door Handle For 92 - 05 Chevy Astro GMC Safari USD 10.00 New Set (2) Front Suspension Upper Ball Joints Fits 2005-2014 2015 Toyota Tacoma USD 14.33 Pair Outside Rear Driver + Passenger + Tailgate Door Handles For TOYOTA SIENNA USD 17.30 Shop CategoryStore Home UTV & ATV Brake System Parts▷Brake pads♢Sintered Brake Pads♢Kevlar Carbon Brake Pads◈Brake shoes Auto parts◈Towing Mirrors◈Ignition Coil◈Lift Support◈Wheel Spacers◈Key Case◈Struts/Absorbers Shocks ◈Fuel Pump Assembly◈Starter◈CV Axle◈Trunk Floor Mats◈Interior Light◈Exterior Light◈Blower Motor◈Side/Cab Marker Light◈complete struts◈Instrument Light◈Instrument panel light◈Resistor◈Window Switch wheel hub bearing Door handle Cylinder Head Gasket Sets suspension kit◈suspension xinren◈suspension cj◈suspension gxy◈suspension fu AC Compressor LED strip light Brake Pads & Rotors◈Brake Rotors◈Brake Pads◈Brake Rotors and Pads◈Brake Pad Sensor◈Brake Drum◈Brake Shoe Air suspensions cold Cushion seat leveling lift kit Nerf Bars & Running Boards Alternators Exhaust System Parts Cylinder Piston Gasket Kit Specific LED Package Kit Wheel lug nut Window Regulator ball joint Fuel Injectors Car Cover Electrical & Test Equipment Automotive Tools Thermostat Housing Radiator Coolant Tank Windshield Wiper Motor Door Lock Actuator Power Steering Pump Timing Solenoid Valve Electric Water Pump Valve Cover Fuel Tank Pipe Oil Pump Timing Chain Kits Timing Belt Kits Water Pumps Strut Tie Bar Throttle Body Harmonic Balancer Oil Pan Oxygen Sensors AC Condenser & Radiator◈AC Condenser◈Radiator◈Charge Air Cooler◈AC Condenser & Radiator Mass Air Flow Sensor Intake Manifold Motorcycle Carburetor Urea Pump EGR Valve Cooling Fan Clutch Cooling Fan Hydraulic Lifter&Roller Lifter Suspension+Strut+Bearing Starter Relay Solenoid Regulator Rectifier Gas Can Spout Wheel Lock HVAC Towing&Hauling ATV Rear Wheel Axle Parking sensor Car Antenna ABS Wheel Speed Sensor PTO Clutch Vacuum Pump Intake Exhaust Valves Tensioners Spoilers & Wings Oil Cooler Purge Valve Knock Sensor Turbocharger Clock Spring Crankshaft Position Sensor Camshaft Position Sensor MAP Sensor Oil Pressure Sensor Throttle Position Sensor Stator Catalytic Converter idle air control valve Transfer Case Shift Motor Secondary Air Injection Pump Running Board Motor Clutch Slave Cylinder Wheel Spacers Consoles & Parts Roof rack Bumper Tire Pressure Gauge Steering Rack Wiring Harness Air Diesel Heater Spark Plug Ignition Wire Engine Mount Glow Plug Air Cleaner Filter Box Ignition Distributor Cylinder Piston Kit Pressure Tester Gauge Jack Stands Tire Changers Wheel Lug Sun Visor window visor trim tilt motor wiring harness ATV Brake Caliper Car Carburetor EGR Tube Pipe Air Intake Hose Cold Air Intake Kit Oil Catch Can Tank Crankcase Vent Valve Horns Air suspension valves solenoid Heater Control Valve Steering U-Joint Fuel Shut Off Solenoid Fuel Cell Tank Driveshaft Height Level Sensor Temperature Sensor Vacuum Actuator Radiator Hose Release Cable Ballast module Rubber Seal Strip Air Horn Dipstick Removal Open Tools Camshaft ATV Brake Master Cylinder 4WD Actuator Trailer Adapter Battery Switch Rotary Vane Vacuum Pump Electric Motor Throttle Cable Carb Bracket Oil Fuel Hose Line Oil Filter Wrench suspension 5 LED headlight Assembly headlight motorcycle Foot Rest Pedal O Ring Neutral Safety Switchs Oil Transter Pump instrument lights water Pump Impeller LED 3RD Brake Light Tire Pressure Sensor Fastener Strut Mount A/C Expansion Valve Wheel Stem Air Valve Cap Crankcase Breather Filter Splash Guards & Mud Flaps Rocker Arm Intercooler Pipe Kit Evaporators Heater Cores vehicle speed sensor RV Water Pump Fuel Pressure Regulator Light Bar Mount Bracket Sensor-8 Wastegate tire cover CV axle+Brake Pads/Rotors Steering Shaft transmission filter transmission kit Steering Wheel Steering Wheel Hub Steering Gear Box Alternator Bracket Kit snorkel air intake CDI BOX Spindle Proportioning Valve Hydraulic Hand Brake Home & Garden◈Portable Fans Other Golf Cart Parts Intercooler Window Glass Hinge 4 pcs wheel hub bearing ATV Tires Tire Inflator Air Pump jumper cable Brake Line Lock Kit Fender Flares Hood Latch Lock Other Handlebars & Levers Brake Oil Hose Tonneau Cover Bug Shield dash cover Front Bumper Lip primary drive clutch air check valve golf Brake Line Tubing Kit OtherHot Item Low Pressure Electric Fuel Pump 12V Gas Diesel Inline HEP-02A BHEP-02A USD 10.66 Fuel Pump for Chevy S10 GMC Sonoma Hombre 4.3L 97-02 for Isuzu Hombre 4.3L 97-20 USD 29.99 For Chevy Silverado GMC Sierra 1500 2500 3500 1999-04 Fuel Pump Module Assembly USD 26.99 2pc 3157 4114 4157 LED DRL Driving Daytime Running Light Bulbs 12SMD 6000K White USD 9.99 2 Bulbs H4 HB2 9003 LED Headlight Kit Combo 2600W 390000LM High Low Beam 6000K USD 11.98 Picture
For 1996-2010 Chevrolet GMC 4.3L 4.8L 5.0L 5.3L 5.7L 6.0L Cooling Fan Clutch
Fitment:
2007 Chevrolet Avalanche1996-1998 2011-2013 Chevrolet Express 15001996-2009 2011-2013 2015 Chevrolet Express 25001996-2005 2008-2009 2011 2013 Chevrolet Express 35002011-2013 Chevrolet Express 45001996 Chevrolet G301999-2007 Chevrolet Silverado 15002001-2003 2005-2006 Chevrolet Silverado 1500 HD1999-2003 2006 Chevrolet Silverado 25002001-2003 Chevrolet Silverado 2500 HD2001-2006 Chevrolet Silverado 35002000-2007 Chevrolet Suburban 15002011 Chevrolet Suburban 25002007 Chevrolet Tahoe1996 GMC G35001996-2002 2011-2013 GMC Savana 15001996-2005 2007-2009 2011 2013 2015 GMC Savana 25001996-1998 2008-2009 2011-2013 2015 GMC Savana 35002011-2013 GMC Savana 45002007 GMC Sierra 15002005 GMC Sierra 2500 HD2001-2006 GMC Sierra 35002000 2007 GMC Yukon2011 GMC Yukon XL 2500
What is a fan clutch?
A fan clutch is a thermostatic engine cooling fan that can freewheel at low temperatures when cooling is not needed, allowing the engine to warm up faster, relieving unnecessary load on the engine. As temperatures increase, the clutch engages so that the fan is driven by engine power and moves air to cool the engine.
Most fan clutches are viscous or "fluid" couplings, combined with a bi-metallic sensory system similar to that in a thermostat. Some clutches are electronically controlled (instead of bi-metallic strip). These provide the potential to control the level of engagement depending on any number of inputs. Common controlling factors might include engine oil temperature, transmission oil temperature, coolant temperature, AC system pressures and ambient air temperature.
How to detect a faulty fan clutch?
-Fan spins excessively when engine is stopped.
-Poor A/C performance at idle or low vehicle speeds.
-Fan speed does not increase when engine is hot.
-Fan speed does not increase until engine is excessively hot.
-Fan blade tip moves more than 1/4” front to back.
-Fan turns roughly or does not turn at all.
-Excessive fan noise at all speeds due to failed bearing.
-Vibration that increases with engine speed.
How to replace a fan clutch?
Materials Needed
-Pulley locking tool
-Wrench
-Socket set with ratchet
-Rubber mallet
Step 1: Remove the fan shroud. Because every application is different, some of these steps may need to be altered in order to fit your specific application. On most applications, however the fan shroud is fastened by several bolts which will need to be removed in order to remove the shroud. Most applications will also require removal of the top radiator hose in order to get the fan shroud out. If this is the case, be sure to drain your coolant system prior to doing this. Once this is done, you can remove the fan shroud from the engine compartment.
Step 2: Remove the fan. There are typically two types of ways the fan will be attached; one will be with four large bolts, in which case you will need just a basic wrench of the appropriate size to remove. The other method of attachment is a large nut that will likely require the use of a special pulley locking tool that is used to keep the pulley from moving while removing the nut.
Since this is a specialty tool, most people may not have access to this tool. If this is the case, an alternative to using this specialty tool can be the use of a screwdriver. Use the screwdriver to hold keep the bolt in place while loosening the nut. Pay special attention to the placement of the screwdriver while doing this as this can damage the edges of the bolts if not done properly.
Step 3: Rock from side to side. Once all bolts and/or nuts have been removed, hold the fan with both hands slightly rocking it from side to side sliding it off of the water pump shaft.
Step 4: Remove the bolts. Secure the fan on a work table with plenty of room to work with the fan shaft facing your direction. There are four large bolts in the center of the fan assembly that hold the clutch in place. Remove these bolts and the clutch will be free from the fan.
Step 5: Install the new fan clutch. Hold the new fan clutch in place aligning the bolt holes in the same place as the old clutch.
Lightly run the bolts into the holes making sure the threads are lining up properly
Tip: The bolts should run into the threads freely with little or no resistance. If they feel tight or like you are using too much force, you are likely cross threading them which can lead to the bolts not staying in tightly and eventually falling out. Note, this is extremely important.
Step 6: Tighten the bolts. Once you’ve run all bolts in finger tight, use your wrench to tighten them according to factory specifications (refer to your service manual or instructions with the new fan clutch).
Step 7: Put the fan back into the engine. Slide the fan assembly back into the engine compartment paying special attention to the water pump shaft alignment.
Once in place, gently run the four bolts back into place holding the fan with one hand and running the bolts back in with the other. This may take some maneuvering to keep things straight, but remember, slow and steady and paying attention to detail is important.
When all four bolts are back in place and run in finger tight, use the same wrench you used to remove them with to tighten them back up according to factory specifications (Again, refer to your service manual for exact specifications).
If your application requires you to remove the top radiator hose to get the fan shroud out, now would be the time to reinstall that same radiator hose. Be sure to also remember to refill your coolant system if draining it was part of the removal process.
Slide the fan shroud back into place lining up the bolt holes in the same position as it was removed. Run each bolt back in finger tight until all are accounted for and tighten per factory specifications (Refer to service manual for torque specs).
You have now replaced your fan clutch. A good practice as always is to start the vehicle and listen for abnormal noises and watch for movements in the replacement parts that are not consistent.
ShippingPaymentReturnsCustomer Servicesresponse
WARNING: Cancer and Reproductive Harm - www.P65Warnings.ca.gov.
1. Package handling takes about 2 business days at our warehouse, so please make sure entering correct payment and shipping information before checking out. Once your payment is completed, we are not going to accept any more changes to your order.
2.All domestic orders will be shipped via USPS, UPS or Fedex from our US warehouse and usually arrives to your door in about 2-7 business days.
3.Local pick up is not available.
4.Orders to the rest of world may be shipped out from our warehouse in HongKong.
5.International Buyers C Please Note:
a. Import duties, taxes and charges are not included in the item price or shipping charges. These charges are the buyers responsibility.
b. Please check with your country customs office to determine what these additional costs will be prior to offerding/buying.]
[We only accept payment through PayPal. You can open a Paypal account at]
1.All of our brand new items come with a 60-Days money-back guarantee.
2.We define the item as defective only if it doesn't function as described, It is the buyer's responsibility to understand the item description before offerding.
3.We will replace the defective items, provided that they are in stock within the warranty period posted with the listing and the buyer return the original item and pay for the S&H cost for the replacement.
4.We will refund the purchase price if the replacement is not available or buyer prefers a refund and send the original item back at his/her own cost.
5.Shipping& handling cost are not refundable.
6.Man-made damage by abuse or wrong operation is not covered by this warranty.
7.No product liability insurance is assumed.
8.Refunds will be credited within 5 to 7 business days of receiving the return. When we've received and processed the return, we will refund the applicable amount minus any Recovery Fees (See Details Below) for the amount you paid for the item(s), plus any applicable sales tax. ]
Q: How do I pay for my purchase?
A: MY store accepts PayPal.
Q: When will the item be shipped out?
A: This item will be shipped with 2 business day once payment completed.
Q: Where is my tracking number?
A: Please log on your account, click "my "-->"my summary", or open your email box and find the shipping notification email.
Q: How do I return an item?
A: My tore accepts returns. Items must be returned within 60 days. Refunds will be given as money back. Please contact our customer service before you return an item. ]
1. We will leave a response once we get your payment.
2. If you are dissatisfied for any reason, please do contact us aresponse. We will work hard to make sure EVERY CUSTOMER 100% SATISFIED and resolve any problem for you and always leave a response to all our customers.
3. If you are satisfied with the product you received, wish you can leave us a response.
Copyright of CN-Batteries. All rights reserved.
Powered by SoldEazy