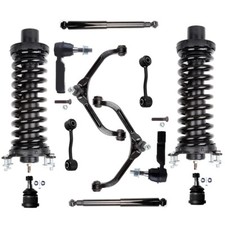
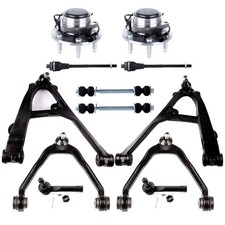
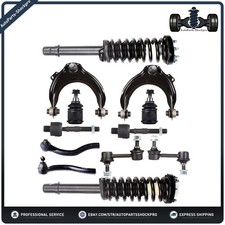
Fit For:For 2002-2006 Cadillac EscaladeFor 2006 Chevrolet Avalanche 1500For 1999-2006 Chevrolet Silverado 1500For 2007 Chevrolet Silverado 1500 ClassicFor 2000-2006 Chevrolet Suburban 1500For 2000-2006 Chevrolet TahoeFor 1999-2006 GMC Sierra 1500For 2007 GMC Sierra 1500 ClassicFor 2000-2006 GMC YukonFor 2001-2006 GMC Yukon XL 1500Package Includes: 12Pieces For Chevrolet Silverado 1500 Classic 2007 Front Control Arm Ball Joint
Fit For:
For 2002-2006 Cadillac Escalade
For 2006 Chevrolet Avalanche 1500
For 1999-2006 Chevrolet Silverado 1500
For 2007 Chevrolet Silverado 1500 Classic
For 2000-2006 Chevrolet Suburban 1500
For 2000-2006 Chevrolet Tahoe
For 1999-2006 GMC Sierra 1500
For 2007 GMC Sierra 1500 Classic
For 2000-2006 GMC Yukon
For 2001-2006 GMC Yukon XL 1500
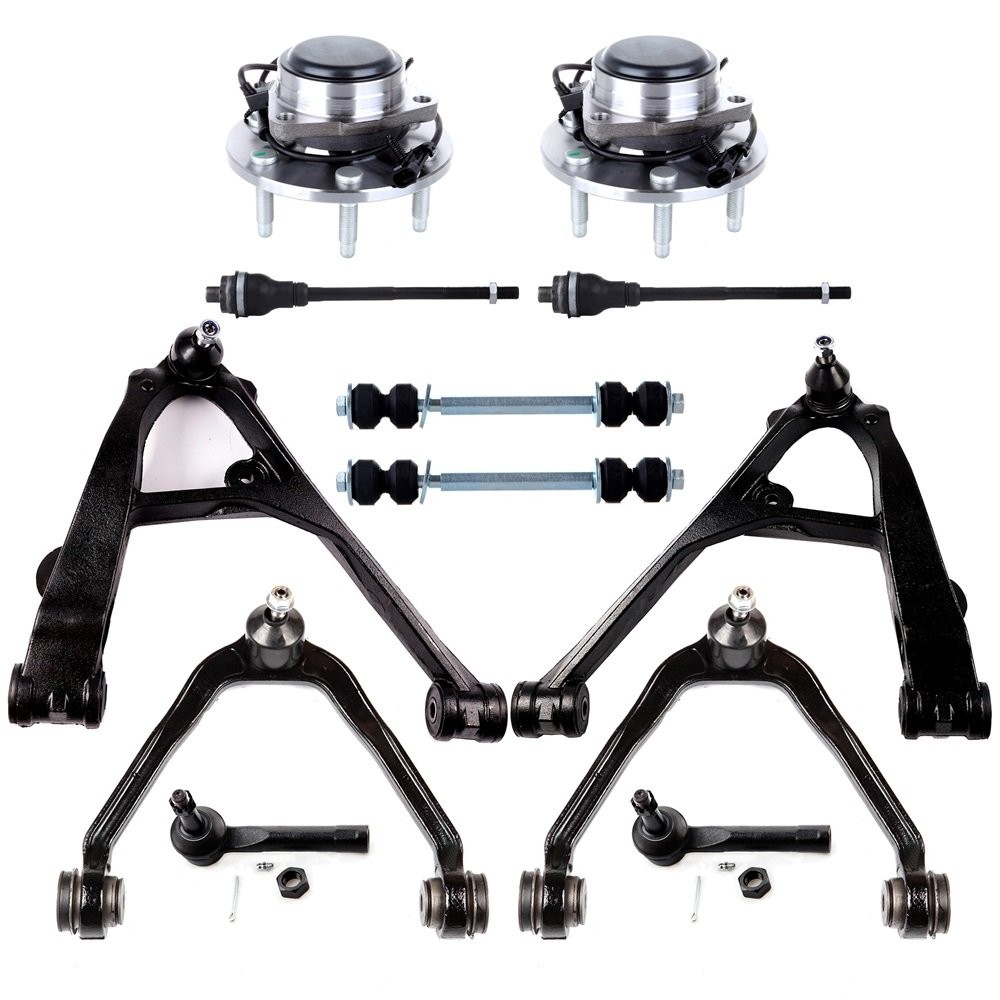
Package Includes:
2x Front Wheel Hub Bearing -515054
2x Front Inner Tie Rod End -ES3488
2x Front Sway Bar End Link -K80631
2x Front Outer Tie Rod End -ES3493T
2x Front Upper Control Arm And Ball Joint -K80942
1x Front Lower Control Arm And Ball Joint - Passenger Side -K620380
1x Front Lower Control Arm And Ball Joint - Driver Side -K620381
Fault judgment:
- When encountering a limp road, the vibration is strong, and it is shaking up and down, and the body is twisted.
- When the car is driving, every time it vibrates up and down, the suspension device makes a "guckling" noise
- If there is a problem with the front wheel suspension system, the direction will deviate to one side, and continuous correction is required to maintain normal driving.
A normal shock absorber will generate heat when it is working. If it does not generate heat or if oil leaks from the shock absorber, it means that the shock absorber has been damaged. During the inspection, the condition of the shock absorber rubber sleeve should also be checked. If it is found to be damaged, it should be replaced together with the shock absorber in time. In addition, it may be that the fastening bolts are loose.
Know how to replace the swag bar link:
- step 1:Engage the parking brake. Set the parking brake on the vehicle and set the wheel block on one of the tires you will not remove.
- step 2:After the tire screws are loosened, jack up the jack.
- step 3:Remove tires. At this time, completely remove the wheel nut, and then remove the tire from the vehicle.
- step 4:Find the rocker link to be replaced. The anti-roll bar is usually located at the front of the car and is bolted to the suspension of the car.
- step 5:Remove the lug nut. After removing the top nut, remove the lower nut. After removing the two nuts, pick up the pry bar and apply pressure on the rocker near the connecting rod.
- step 6:Make sure that the new joystick link matches the old link. Use a pry bar to apply downward pressure on the rocker, and then install the new link to the position of the old link. Make sure that the installation direction is correct, as the two ends look very similar.
- step 7:After the link is in place, install the nut and tighten it to the appropriate torque specification.
- step 8:Put the tires back into the vehicle. Tighten the lug nuts as much as possible, but do not over tighten them. Excessive pressure on the car may knock it off the jack bracket.
- step 9:Tighten the lug nut. After the vehicle returns to the ground, tighten the lug nut to the appropriate torque specification.If you want to change multiple anti-roll bar links, just repeat these steps on the other side.
Know how to replace the ball joint:
Engage the parking brake. Set the parking brake on the vehicle and set the wheel block on one of the tires you will not remove. After the tire screws are loosened, jack up the jack.At this time, completely remove the wheel nut, and then remove the tire from the vehicle.
- step 2: Removing the Old Ball Joint
- Pop loose the ball joint. You will most likely need to use a hammer and a special tool called a “pickle fork” or tie rod separator to get enough leverage to maneuver.
- With the wrench, remove the largest nut from the joint, replace with the new nut, and then drive the pickle fork between the control arm and the steering knuckle. And before hammering away,you will need to put the castellated nut on.
- Remove the allen bolts and slide the control arm free. Loosen bolts or drill out rivets holding the ball joint in place, and slide out the ball joint.
- step 3: Installing the New Joint
- Guide the new joint through the knuckle hole. Slide the new rubber boot over the ball joint’s stud and guide the new ball joint back up through the steering knuckle hole, where it came from.
- Bolt the joint into place using the hardware included.
- Torque the bolts to the proper specifications.Generally, the specs will be about 44 pounds per foot on the screws and around 80 for other bolts. Always defer to the owner's manual for accurate numbers, however.
- Screw in the new grease fitting and pump grease into the
- Please be sure to check carefully whether the part is suitable for your car model before placing an order.
- If you have any questions after receiving the goods, please contact us in time, we will give you a satisfactory answer.
Item SpecificsBrand everpartstorecsManufacturer Part Number 14009058Manufacturer Warranty 10 YearsFeatures Easy to ReplacePlacement on Vehicle Front Inner Outer Upper Lower Right LeftType Control Arm & Ball Joint AssemblyMaterial Alloy SteelOE/OEM Part Number Suspension arm Kit,replacing control arm car,rods endsInterchange Part Number Part Number wheel hub bearing assemblyItems Included Mounting HardwarePerformance Part NoUniversal Fitment NoVintage Car Part NoMounting Style Bolt-OnABS Sensor Has ABS with tegral SensorFeatures GreasableBolt Circle Diameter 5.45 InQuantity 12Pcs
Shipping
tellusthenewaddresswithin 12 hoursafterpayment
(nodeliverytoremoteareas).
Anypayments accepted by also can be accepted.
Service
within30days.
Do check the compatible chart or contact us if you have any quetion in compatibilities before ordering the items.
STORE HOMEHOT SELLINGCOOL SUMMERSENSORSEXTERIOR Shop CategoryStore Home lift support Condenser Air Diesel Heater Blower Resistor Blower Motor Heater Core Suspension Kits Thermostat Housing ABS Wheel Speed Sensor Window Switch Oxygen Sensor 3Rd Brake Light Mass air flow sensor AC Compressor Cooling Fan Towing Mirrors Door Handle Radiator Sensor Knock Sensor Catalytic Converter Window Regulator Wheel Spacers Alternator Headlight Assembly Fuel Pump Assembly Leveling Lift Kits Spoiler Wing CV Axle Wheel Hub Bearing Knuckle Turbocharger Windshield Wiper Motor Engine Mount Head Gasket Set complete strut 4 Pcs Wheel Hub Bearing Wheel Hub Bearing Tire Anti-skid Chain Brake caliper Shocks Struts Air Suspension Brake rotor pad Struts & Suspension Kit & Hubs Driveshaft Other
12Pieces For Chevrolet Silverado 1500 Classic 2007 Front Control Arm Ball Joint
Fit For:
For 2002-2006 Cadillac Escalade
For 2006 Chevrolet Avalanche 1500
For 1999-2006 Chevrolet Silverado 1500
For 2007 Chevrolet Silverado 1500 Classic
For 2000-2006 Chevrolet Suburban 1500
For 2000-2006 Chevrolet Tahoe
For 1999-2006 GMC Sierra 1500
For 2007 GMC Sierra 1500 Classic
For 2000-2006 GMC Yukon
For 2001-2006 GMC Yukon XL 1500
Package Includes:
2x Front Wheel Hub Bearing -515054
2x Front Inner Tie Rod End -ES3488
2x Front Sway Bar End Link -K80631
2x Front Outer Tie Rod End -ES3493T
2x Front Upper Control Arm And Ball Joint -K80942
1x Front Lower Control Arm And Ball Joint - Passenger Side -K620380
1x Front Lower Control Arm And Ball Joint - Driver Side -K620381
Fault judgment:
- When encountering a limp road, the vibration is strong, and it is shaking up and down, and the body is twisted.
- When the car is driving, every time it vibrates up and down, the suspension device makes a "guckling" noise
- If there is a problem with the front wheel suspension system, the direction will deviate to one side, and continuous correction is required to maintain normal driving.
A normal shock absorber will generate heat when it is working. If it does not generate heat or if oil leaks from the shock absorber, it means that the shock absorber has been damaged. During the inspection, the condition of the shock absorber rubber sleeve should also be checked. If it is found to be damaged, it should be replaced together with the shock absorber in time. In addition, it may be that the fastening bolts are loose.
Know how to replace the swag bar link:
- step 1:Engage the parking brake. Set the parking brake on the vehicle and set the wheel block on one of the tires you will not remove.
- step 2:After the tire screws are loosened, jack up the jack.
- step 3:Remove tires. At this time, completely remove the wheel nut, and then remove the tire from the vehicle.
- step 4:Find the rocker link to be replaced. The anti-roll bar is usually located at the front of the car and is bolted to the suspension of the car.
- step 5:Remove the lug nut. After removing the top nut, remove the lower nut. After removing the two nuts, pick up the pry bar and apply pressure on the rocker near the connecting rod.
- step 6:Make sure that the new joystick link matches the old link. Use a pry bar to apply downward pressure on the rocker, and then install the new link to the position of the old link. Make sure that the installation direction is correct, as the two ends look very similar.
- step 7:After the link is in place, install the nut and tighten it to the appropriate torque specification.
- step 8:Put the tires back into the vehicle. Tighten the lug nuts as much as possible, but do not over tighten them. Excessive pressure on the car may knock it off the jack bracket.
- step 9:Tighten the lug nut. After the vehicle returns to the ground, tighten the lug nut to the appropriate torque specification.If you want to change multiple anti-roll bar links, just repeat these steps on the other side.
Know how to replace the ball joint:
Engage the parking brake. Set the parking brake on the vehicle and set the wheel block on one of the tires you will not remove. After the tire screws are loosened, jack up the jack.At this time, completely remove the wheel nut, and then remove the tire from the vehicle.
- step 2: Removing the Old Ball Joint
- Pop loose the ball joint. You will most likely need to use a hammer and a special tool called a “pickle fork” or tie rod separator to get enough leverage to maneuver.
- With the wrench, remove the largest nut from the joint, replace with the new nut, and then drive the pickle fork between the control arm and the steering knuckle. And before hammering away,you will need to put the castellated nut on.
- Remove the allen bolts and slide the control arm free. Loosen bolts or drill out rivets holding the ball joint in place, and slide out the ball joint.
- step 3: Installing the New Joint
- Guide the new joint through the knuckle hole. Slide the new rubber boot over the ball joint’s stud and guide the new ball joint back up through the steering knuckle hole, where it came from.
- Bolt the joint into place using the hardware included.
- Torque the bolts to the proper specifications.Generally, the specs will be about 44 pounds per foot on the screws and around 80 for other bolts. Always defer to the owner's manual for accurate numbers, however.
- Screw in the new grease fitting and pump grease into the
- Please be sure to check carefully whether the part is suitable for your car model before placing an order.
- If you have any questions after receiving the goods, please contact us in time, we will give you a satisfactory answer.
ShippingPaymentServiceNote
tellusthenewaddresswithin 12 hoursafterpayment
(nodeliverytoremoteareas).
Anypayments accepted by also can be accepted.
within30days.
Do check the compatible chart or contact us if you have any quetion in compatibilities before ordering the items.