3x Rear Air Ride Suspension Shocks Compressor Pump Fits Escalade Suburban Yukon For Sale - New and Used
When you click on links to various merchants on this site and make a purchase, this can result in this site earning a commission. Affiliate programs and affiliations include, but are not limited to, the eBay Partner Network.

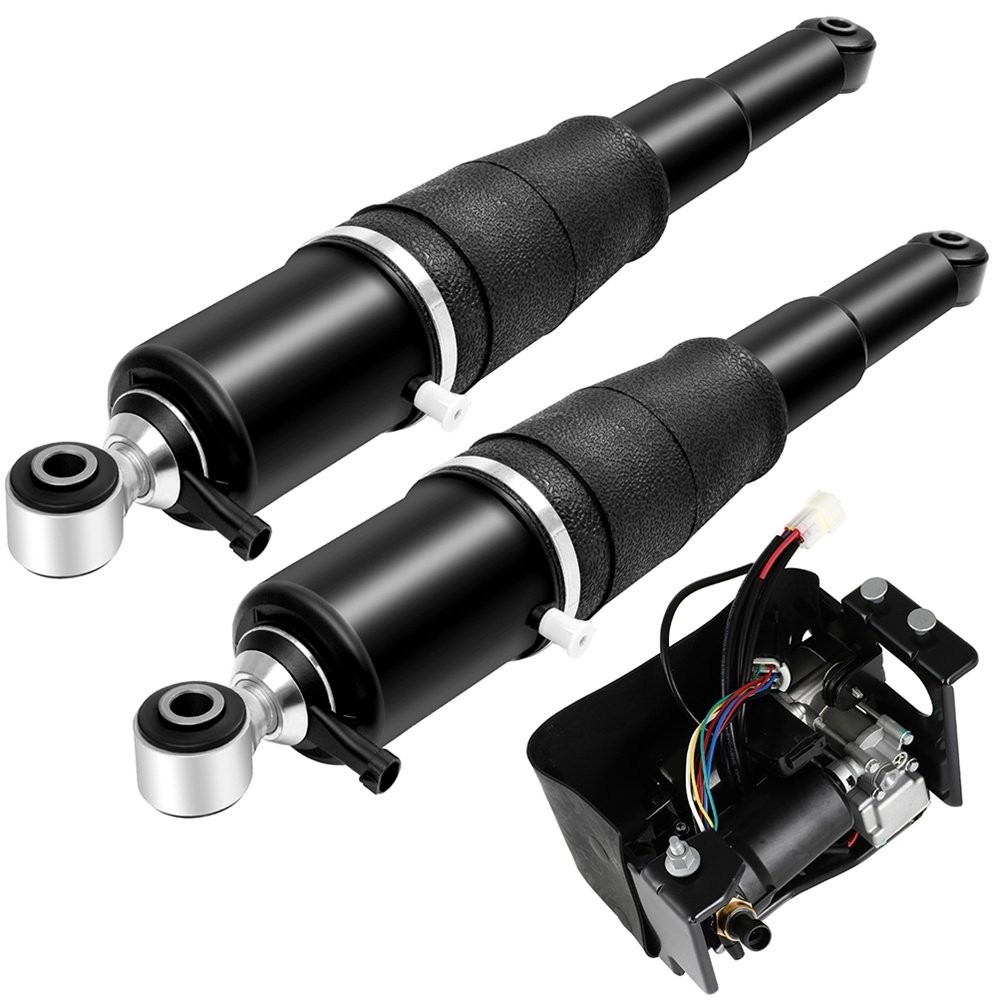
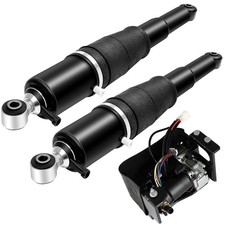
3x Rear Air Ride Suspension Shocks Compressor Pump Fits Escalade Suburban Yukon:
$225.58
Welcome to our store! To avoid you buying the wrong parts, DO CHECK the compatible chart above before placing order. -
Choose a vehicle from the "My Garage" list. Or -
Enter your vehicle's details withYear / Make / Model / Trim / Engine.Or -
Contact us: Ask us for double check. You can distinguish specific model of an automobile by VIN(Vehicle Identification Number).(2) VIN(Vehicle Identification Number) consists of total 17 English letters and arabic digits. (3) VIN does not include the letters I (i), O (o), and Q (q) (to avoid confusion with numerals 1 and 0). For Cadillac Escalade 2002-2014 5.3L/6.0L/6.2L
For Cadillac Escalade ESV 2003-2014 6.0L/6.2L
For Cadillac Escalade EXT 2002-2013 6.0L/6.2L
For Chevrolet Avalanche 2007-2013 5.3L/6.0L
For Chevrolet Avalanche 1500 2002-2006 5.3L
For Chevrolet Suburban 1500 2000-2014 5.3L/5.7L/6.0L
For Chevrolet Tahoe 2000-2014 4.8L/5.3L/5.7L/6.0L/6.2L
For GMC Yukon 2000-2014 4.8L/5.3L/5.7L/6.0L/6.2L
For GMC Yukon XL 1500 2000-2014 5.3L/6.0L/6.2L Placement on Included: 2* Air Suspension Shocks Struts + 1* Air Suspension Compressor Pump Special Note:Fit RWD/2WD OnlyRemoval and Installation Instructions Important Precautions -
Pressure safety– Never attempt to disconnect any air line without fully releasing system pressure; serious injury may result. -
Contamination prevention– Always cap open air line fittings and ports immediately after disconnection to keep dirt, moisture, and grease out of the system. -
Torque compliance– All fasteners must be tightened to the OEM specified torque values. Over?torquing can damage threads or cause air leaks. -
Single?use components– Replace all one?time?use clamps, O?rings, and seals with new parts; never reuse them. -
Strut storage– Used struts should be stored upright (not lying flat) to prevent oil from leaking out. -
Axle?pair replacement– It is strongly recommended to replace both left and right struts on the same axle simultaneously to ensure consistent damping and handling. -
Correct part number– Always use a strut that matches the exact OEM part number for your vehicle; do not interchange parts from different models. Vehicle positioning – Park the vehicle on a solid, level surface. Apply the parking brake and chock the wheels. -
Tools required– Vehicle lift or jack with safety stands, torque wrench, socket set, pliers, and a diagnostic scanner (for system venting and recalibration). -
Safety precautions -
Disconnect the negative battery cable to prevent accidental activation of electrical components. -
The air suspension system operates under high pressure; confirm that the system pressure has been fully released before starting any work. -
For certain models, activate “Jack Mode” or “Tire Change Mode” via the infotainment screen or diagnostic tool to disable the automatic leveling system. Removal Procedure -
Raise the vehicle– Lift the vehicle using a hoist, ensuring the support points align with the vehicle’s designated jacking points. Remove the wheel on the affected side. -
Release system pressure -
Use a diagnostic scanner to command the air suspension system to vent/release pressure. -
If a scanner is not available, carefully loosen the air line fitting at the strut until you hear air escaping; wait until all pressure has been relieved. -
Disconnect the air line -
Clean the area around the air fitting. -
Disconnect the air line from the strut, andimmediately plug both the line and the strut portwith suitable caps to prevent contamination. -
Disconnect electrical connectors– Unplug the height sensor, solenoid valve, and any other electrical connectors attached to the strut. -
Remove mounting fasteners -
Extract the strut– Carefully withdraw the complete strut assembly from its mounting position. Installation Procedure -
Inspection and cleaning -
Inspect the mounting seats, rubber bushings, and bolt holes for wear, damage, or deformation. -
Clean all mating surfaces. -
Check the new strut for any signs of damage or oil leakage. -
Position the new strut– Place the new strut into position, ensuring correct orientation and alignment as per the original installation. -
Secure the upper mount– Install and tighten the upper mounting nutsprogressively to the torque specificationsgiven in the service manual. -
Secure the lower mount– Install the lower bolt(s) and tighten to the specified torque. -
Reconnect the air line -
Remove the protective caps from both the line and the strut port. -
Connect the air line fitting securely. If a one?time-use clamp was used, replace it with a new one. -
Reconnect electrical connectors– Plug in all sensors and solenoid connectors. -
Install the wheel– Mount the wheel, lower the vehicle to the ground, and then torque the wheel lug nuts to the manufacturer’s specification. Inspection and Calibration -
System pressurization– Start the engine and use the diagnostic scanner to command the air suspension system to inflate/pressurize. -
Leak check– Inspect all air line connections for signs of leakage. -
Height calibration– -
Road test– Drive the vehicle at low speed, listening for unusual noises and observing ride stability. After approximately 1–2 hours of driving, re?inspect the strut for oil leaks and re?check the torque of all mounting bolts. Notice:
Please check the model and important parameters before purchase to avoid unnecessary after-sales problems, if you are not clear, please feel free to contact us, thank you for your cooperation! Item SpecificsUPC Does not applyBrand VaultProManufacturer Part Number 14254864Manufacturer Warranty 1 YearPlacement on Vehicle Rear Left RightType Air Suspension Shock StrutQuantity 3Material Iron, Aluminium Alloy, RubberFitment Type Direct ReplacementItems Included Air Suspension Shock Strut, CompressorMounting Style Screw-OnOE Spec or Performance/Custom OE SpecCustom Bundle YesFeatures SealedModified Item NoAdjustable YesPerformance Part YesUniversal Fitment NoVintage Car Part NoSurface Finish High QualityGreasable or Sealed SealedInterchange Part Number Part Number 19300072, 22187152, 22187156, 22187158, 22400885, 25885467Superseded Part Number 15756926, 15852159, 15869656, 15869658, 15918525, 15924688Single Weight(LB) 29.829Drive Layout RWD/2WDPlatform GMT800 GMT920Maximum Operating Pressure (psi) 160Minimum Operating Pressure (psi) 90Upper Mount Type EyeletLower Mount Type Eyelet About Us: We are committed to making the best auto-parts products and providing you with better services.
So if you have any quesiton or problem, please fell free to contact us about that. Payment: Any payment can be accepted by . Shipping: 2-8 working days in transit. Product will be shipped within 2 business days after full payment is received and verified.
USPS, UPS, FedEx shipping will be provided.
Delivery time is about 2-8 business days to most of free return provided. Contact Us: Any quesiton or problem, do contact us please.
We are always online to answer.
Note: Do check the compatible chart before paying the items, or contact us for checking the compatibilities for your vehicles/cars/trucks.
|
|

Related Cars:
2003 Farboud GTS
2002 Maserati Coupe
2009 Pontiac G8 GXP Street Concept
2000 Detomaso Pantera Concept

2010 Buick Regal GS Concept
2011 Subaru Impreza WRX STi
2000 BMW M3
2010 Porsche 918 Spyder Concept
2004 Saturn Curve Concept
1958 Ferrari 250 Testarossa
Related Items: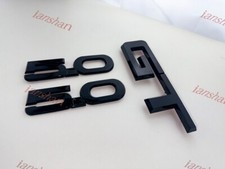
3X Set Side 5.0 Rear DeckLid GT Emblems Badges 3D Replacement Gloss Black $35.00
3x Rear Air Ride Suspension Shocks Compressor Pump Fits Escalade Suburban Yukon $225.58
3x Rear Catalytic Converter For 2004-2006 Toyota Sienna 3.3L Bank 1 & 2 $148.96
|