Store Categories Store Categories Corporate Culture
Product Description
Feature:
1: According to the original factory specifications,perfect match for the original car.
2: Own different test machines to design exact accurate parameter for our products.All switches were tested for performance.
3: Made by high quality material, lightweight, anti-rust, colorfast and durable.
4: Aftermarket product with premium quality.
5: Stable performance, high reliability,suitable for replacing your broken one.
Material: Metal
Color: White
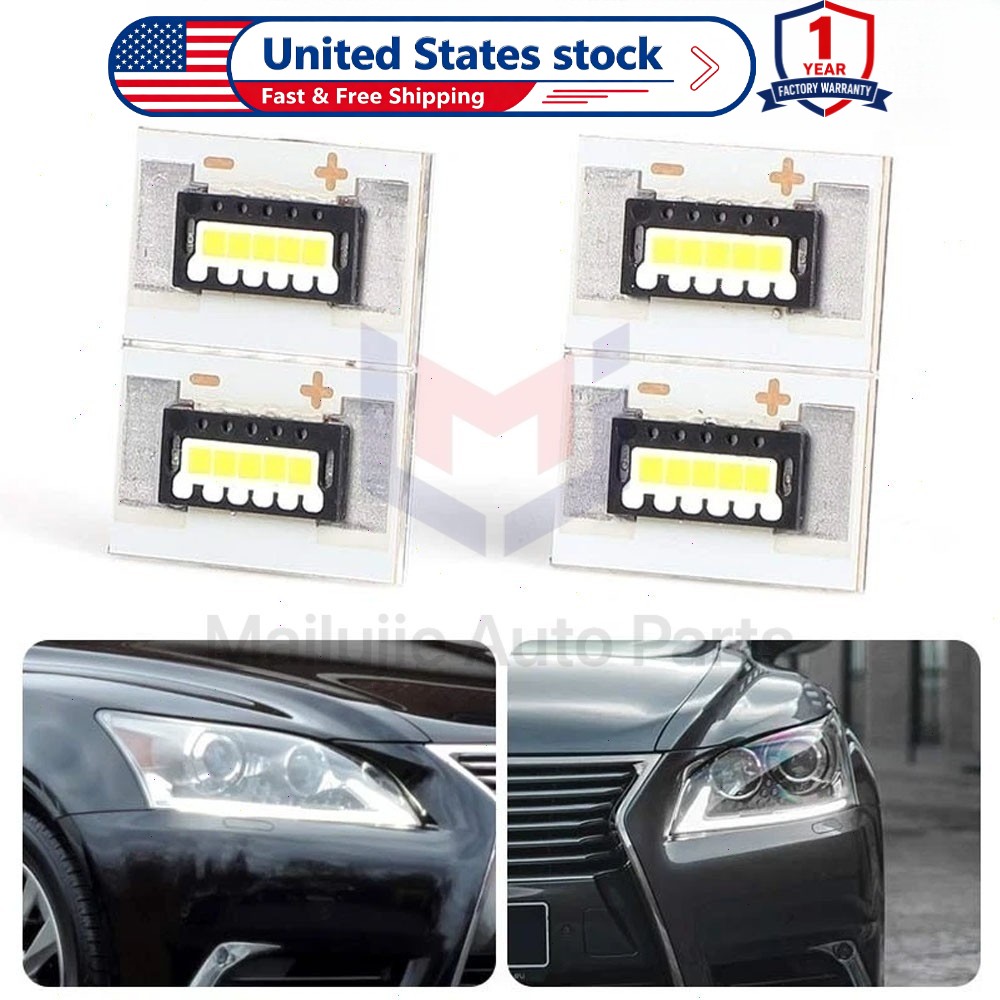
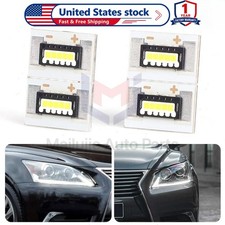
Part Number: LED Angel eye boards chip
Fitment: For Lexus LS460 2013 2014 2015 2016
Package Include:
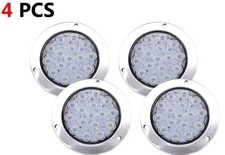
4PCS set White Headlight DRL Angel Eye LED Boards
1Please check the description or use the year/make/model check finder and replace part numbers to confirm the compatibility before purchasing.
3:If you are unsure, you can consult us before placing an order to understand the situation.
4:If you encounter any installation problems or if the headlights still don\'t work after installation, you can contact customer service for after-sales support
(please provide videos and pictures of the problem encountered during product installation when contacting customer service for after-sales support).
Product Name: Automobile headlight LED driver Light Board
Note:
The failure, flickering, or complete non-operation of the headlight chip is mainly caused by long-term high-temperature operation, voltage fluctuations, and electronic component aging.
For minor flickering issues, you can first check the heat dissipation and wiring connections; for severe non-operation or persistent faults, please replace one set (headlight LED driver chip). This is the best solution to solve the problem.
Product Name: Automobile headlight LED driver chip
How to replace:
1: Pry open the headlight housing with a plastic pry tool to access the original driver chip (take care to avoid scratching the headlight housing surface).
2: Disconnect the wiring harness from the original chip, then unscrew or pry the chip from the heat sink. Clean the heat sink surface of any residual thermal conductive silicone or debris.
3: Apply a thin, even layer of high-quality thermal conductive silicone to the back of the new chip (ensure the LED driver module is in full contact with the heat sink for effective heat dissipation).
4: Align the new chip with the original mounting position on the heat sink, secure it with screws or clips, and reconnect the wiring harness.
5: Reassemble the headlight housing and press it firmly into place. Test the headlight function to confirm normal operation. No programming required.
NOTE:
This product must be installed with sufficient thermal conductive silicone and ensure full contact with the heat sink.
This is the best way to ensure the longevity and stable performance of the headlight chip.
Thank you for choosing our store. We are committed to providing reliable products and professional service.
The VIN number is a 17-digit vehicle chassis code. It may appear on the dashboard by the windshield, the label on the driver’s door frame, vehicle registration documents, insurance certificates and the metal identification plate in the engine bay.
Pre-Sales & After-Sales Support
For product compatibility inquiries, please send us the following information so we can assist you quickly:
- Vehicle model and year
- Clear photos of the front headlights
- Vehicle Identification Number (VIN)
- Original part number and photos
For any after-sales issues, please contact us before opening a return or refund request. We will helpyou solve the problem as soon as possible. Kindly provide:
- Unboxing photos or video
- Installation or issue demonstration video
- Detailed description of the problem
Shipping information: Orders are processed and shipped within 24–48 hours after payment confirmation.
- Payment Policy
- Shipping Policy
- Terms of sales
- About Us
- Installation
Payment Policy Payment is expected within 2 days from the end of the sale.
We send all the items are based on your paypal address.
* International Buyers Please Note: Import duties, taxes and charges are not included in the item price or shipping charges. These charges are the buyer’s responsibility. Please check your country’s custom office to determine whether these additional costs will be prior to offerding / buying.
Shipping Policy
Please check your shipping address carefully before checkout, it can\'t be changed if order completed.
Ship within 2-3 business day once payment completed. Orders placed on weekend will be shipped within 3 days.
Seriously promise: Refund or resend will be offered if item still not arrive in 8-15business days. Just send us an email ,we will give you a satisfied solution as soon as possible. Terms of sales
Positive response is very important to us. We hope that you contact us immediately BEFORE you give us neutral or negative response, so that we can satisfactorily address your concerns.
We promise to offer the lowest price and high quality produce.
Our working time: From Monday to Friday(9:00 am to 18:00pm), we do not work on holidays in China,hope you can understand and know that , thank you.
Please always talk to us via Message.
We appreciate your business and look forward to growing our e-Bay sales with satisfied customers. About Us
If you dissatisfied for any reason, Please don\'t leave negative or neutral response at once.
We work hard to make sure EVERY CUSTOMER 100% SATISFIED and resolve any problem for you and always leave positive response for all our customers.
If you are satisfied with the product you received ,please leave us positive response and 5 scores DSR. Installation
Board installation
1: Use a screwdriver to pry open the original chip (chips with
fixing screws need to be opened in advance)
2: After opening the original chip . There are traces ofthermal conductive silicone on the top of the chip. Accordingto the original traces on the back of our products evenlycoated with imported silicone (LED beads must be coatedwith thermally conductive silicone underneath)
3.Snap on the original position. Press to make it flat. Waitfor bonding. Normal installation and use. No programming isrequired.
NOTE:
This product must be installed with thermally conductive silicone.
This is the only way to ensure the longevity of the product.
Light Guide Strip Installation
To change the internal acrylic of the DRL it is usually necessary to open the headlight by heating the original sealant.
After installing the new acrylic guide, it is recommended to use special headlight glue/adhesive or high-temperature automotive sealant to fix it properly.
We do not recommend using regular glue because it can damage the acrylic or affect the lighting.
We recommend that the installation be carried out by a professional
Copyright © 2023 Dianxiaomi