Specifics and Features:
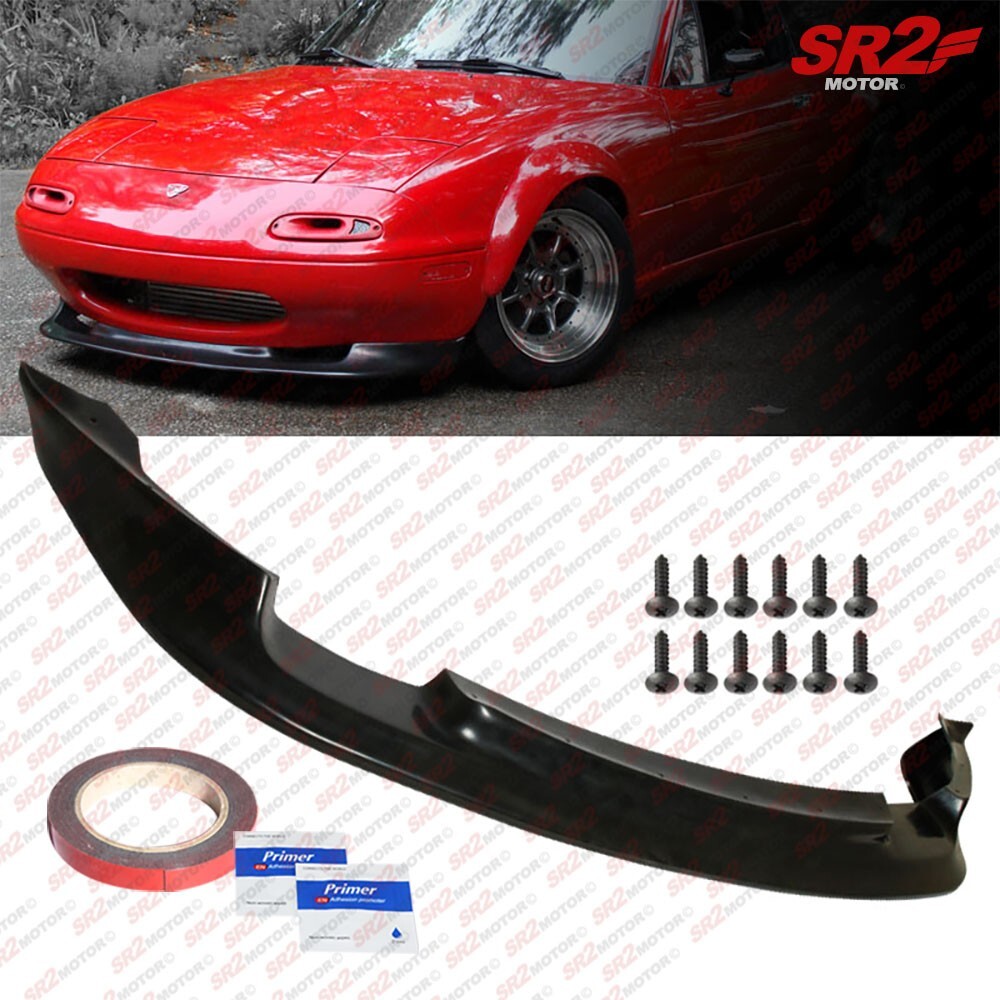
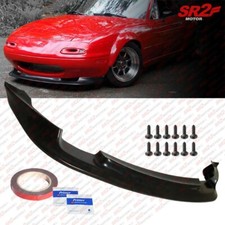
Long Lasting and Shock Resistance; Improve Aerodynamic and Dress-up Exterior Unfinished Unpainted Raw Black Polyurethane Light weight and durable material GV StylePre-drilled mounting screw holes Great add-on to bring a different appearance to vehicle that great for show use Material: Polyurethane
Includes:
1 x Front Bumper PU LipMounting Hardware Adhesive tape / Adhesion promoterNotes:
- Installation guide is not included; Professional installation is strongly recommended
- These are unfinished polyurethane; Some Scuff or scratch can be expected; Sand / Primer is optional but recommended
- Mounting hardware included may vary from photo shown
- ALWAYS PRE-FIT the part before paint / drilled / cut / sanded!!!!!
- NO return or refund for the parts fall off on the road due to installation error
- NO RETURN / EXHANGE IF THE PRODUCT IS PAINTED OR MODIFIED (DRILL / CUT / SANDED)
Compatible with:
1990-1997 Mazda Miata ONLY INSTALLATION PREP GUIDE: Package included: 1. Polyurethane lip
2. Install hardware are sealed at the end of the plastic packaging (hardware included may vary from product image and provided only when its applicable) Material and Tools needed: (NOT included) 1. Sockets / wrenches / screwdriver
2. Drill bits set
3. Sandpaper
4. Soap / acetone
5. 3M industrial double side tape with adhesion promoter (using cheap tape may not stick properly)
PRE-FIT on the vehicle prior any paint / drill / cut / sand / installation! 1. Use masking tape on the places where the aero lip kit may be touching the vehicle body to prevent scratches during the pre-fit
2. Sanding / filing / spacing are required if you are going to paint the lip for a proper clean tight fit
3. Doing the above Pre-fit steps will make sure you have a proper fitment
IF LIP ARRIVED WARPED / DISPORTED: 1. Polyurethane is flexible and bendable and it can reform to its original shape by heat
2. Lay the lip inside the plastic packaging bag on a flat surface outside under the sun heat for several hours
3. Use a heat gun for faster result by gently heat up the distorted area and bend the lip to the correct shape by hand, it will stay in this correct shape when it cools down
4. repeat above steps if necessary INSTALLATION REFFERENCE GUIDE: 1. Apply 3M double side tape
- 3M double side tape should be applied on the indentation of the bumper lip\'s inside edge
- In order for the tape to properly adhere, the surface must be clean and dry (Residual-free cleaner is recommended); Both vehicle and lip must be prepped and cleaned for proper adhesion
- After cleaning, apply adhesion promoter to 3M double-sided tape;
- Make sure 3M tape is smooth and wrinkle free when applying the tape (use multiple small piece tape rather than 1 long piece for best result)
- After applying tape, pull back approximately 1 inch of the protective covering from the tape on each end and make sure the flim is sticking out
2. Place bumper lip on the vehicle
- GENTLY place the lip on the vehicle and make sure everything is position correctly
- While holding on position, pull the tabs created while lightly applying pressure downward.
- Make sure not apply too much force when tearing off the tabs
- After all the flims are removed; apply force and press all the tapes and make sure the tape has bonded properly
- If there are gaps between the lip and vehicle, use the heat gun method to make it sit flush properly
2. Secure the lip
- Use screws to secure both end of the lip (screws are for reinforcement only)
- Use screws to secure the bottom of the lip (be sure to drill pilots holes first)
NO RETURN / EXHANGE IF THE PRODUCT IS PAINTED OR MODIFIED (DRILL / CUT / SANDED)