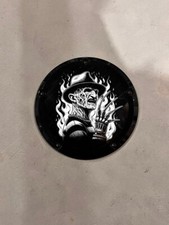
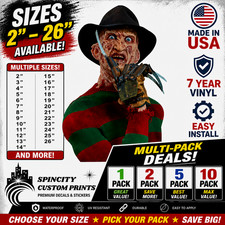
Bring nightmare fuel to life with this Freddy Krueger Nightmare Vinyl Decal — perfect for Halloween, horror fans, and anyone who wants their ride or gear to stand out with a dark, aggressive look.
This decal is die-cut with NO background, giving it a clean, professional appearance on any surface.
🔥 Features:- QTY: 1 Decal
- Material:ORAJET 3651 Premium Vinyl
- Finish: Glossy (Matte available upon request)
- Sizes: Multiple options (2\"–40\"+ available)
- Colors: Multiple (Black, Red, White, Custom Options)
- Durability: 5–7 year outdoor life
- Waterproof & UV Resistant
- Easy Install – Includes transfer tape + instructions
💀 Perfect For:- Car windows / trucks / tailgates
- Laptops / toolboxes / coolers
- Horror collections & Halloween setups
- Gifts for horror movie fans
📦 What You Get:- (1)Freddy Krueger Nightmare Vinyl Decal
- Pre-masked with transfer tape
- Easy step-by-step install guide
SpinCity Quality Guarantee:- MADE IN USA
- Professionally cut using precision plotters
- Clean edges for perfect application
- Fast handling & shipping
⚠️ Note:A basic simple method for installing the vinyl decals...
Upon receiving your decal in the mail - unroll and layout flat. Lightly squeegee out any wrinkles caused by the shipping process.
APPLICATION INSTRUCTIONS1. Gather simple supplies. For this method you\'ll need tape, rubbing alcohol, scissors, napkins, and a squeegeeor credit card. Clean the surface well with rubbing alcohol.
2. Tape Decal to surface as shown using three pieces of tape as shown. Masking tape works well. Make sure you tape it exactly where you want it because that\'s where it will end up.
3. Peel back side without tape and cut wax paper underneath. You might want a friend to help hold the stick part so it don\'t fall back on the glass.
4. With the wax paper cut off on one side, get ready to apply half of the decal. Preferably using a squeegee or credit card applying from the center outwards to reduce air bubbles.
5. Apply the one side from center outwards.
6. Remove the three pieces of tape now. Lift the other side.
7. Peel off wax paper backing from where you cut with the scissorsand hold the rest of the decal up and get ready to apply like you did the other side.
8. Squeegee the other side on as you did the first side. From the center out to reduce air bubbles.
9. Once the whole decal is applied, very slowly remove the top layer of application tape at a sharp angle from the sticker.
10 . Da Da!! Don\'t That Look Great!